Showing posts with label Gifts Ideas. Show all posts

Sunday 23 December 2018

Magical Kewpie Post Tags


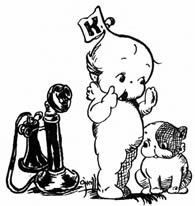
Perhaps my first rather familiar encounter with Kewpie was probably from a bottle of mayonnaise that's widely known as Kewpie Mayonnaise by Kewpie Corporation, a Japanese food manufacturer who popularize the condiment. I might have some personal "close up contacts" with Kewpie dolls while I was young however they didn't get into me till I had some Kewpie Mayonnaise! In fact, Kewpies are comic strip cartoon characters created and developed by Rose O'Neill, an American cartoonist and illustrator in 1909. As little as I know about Kewpies, I believe everyone of us has somehow have some sort of childhood encounter with them.


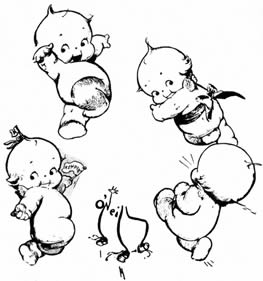
Well, I really have to say they are really cute! When I received my Graphic 45 Christmas Magic collection, I was delighted to see so many cuties within the collection and those Kewpies just caught my attention. They are way too adorable that I had to come up with something. Kewpie Post is what came into my mind back then. Combining with my love for flying matchboxes, I came up with an idea that they can "fly off" from the tags... 


Therefore... Using those cute little Kewpies as Post Dolls, here is what I've come up with...


My initial intention is to make the tags as a whole piece, without any separating elements or parts to them, but this seems like it would have probably "defeated the purpose" of adding wings onto the matchboxes. To make them removable and "flyable", I used magnets to "adhere" them together. Notice how these flying matchboxes "flying away" from their "bases"? That's practically the idea behind.

I used a variety of floral embellishment from mulberry ones to die-cuts holly leaves to create levels of dimensions. Used loads of metallic gold and iridescence here; from fanciful dollies to glittery flowers and ribbons. It's all these shimmerings elements that make the project stands out and not making these Kewpie dolls doing their job in vain.  


"Tis the Season" wreath is a stamped image from Graphic 45 previous Christmas collection, St. Nicholas, which I coloured with colour pencils to create a wreath base for the flying mtachbox to land onto. Subtly choosing colour pencils as my colouring medium to create this distinction, making the process in creating this tag a more "dimensional" one. After much thinking and searching for the right embellishments, I decided to make my very own tassles and insert them as "tails" to match the whole design using the metallic gold crochet yarn I found in a box of yarns and strings. 


Not forgetting these cute little Santa helpers, who play a vital part in making these magical Kewpie Post tags a more interesting one. They are also "removable" with magnets adhered at their backs where they can "jump" onto the wreath base on the tags or back to their respective matchboxes. Added a little jingle bell within each drawer adds some jingles as I pull the drawers. Since it's for this holiday season, I'd think this will add in some fun to the entire project.


Here is a very short and sweet video I made very last minute to show how the entire mechanism work with those magnets incorporated into this project:


Last but not the least, I kept the back of the tags as simple as possible so as not to complicate the design so much. I've provided some tips over at Graphic 45 blog which I didn't share it here. Though I'm a little late in sharing the story behind about this project, be sure to check the tips out at Graphic 45 blog to find out more. As usual, below is the list of supplies I used for this project with links to where to get them:

Monday 10 December 2018

Rustic Nature Wedding Guest Book

On 3rd March this year, I've witnessed the wedding of a lovely couple I know - Ernest and Stephanie. As part of my wedding gift to them, I did a guest book for them. It was also part of Canvas Corp July Wedding Challenge this July. A long overdue project update here. This entry was on draft mode for very long till the birth of their son Theopilus reminded me on this book. Without much talking, here is what I've made for them.


The guest book itself is a vintage ledger book from 7gypsies Architextures which I purchased it for this purpose. I merely did up a mixed media layout for them on the front cover. I used quite a number of die-cuts for this layout, mainly from Tim Holtz steel dies. I tried to match up to the "look" of the photos they provided me and decided upon a rustic, dainty nature look. As always, I love to centralize my design focus as this is one of my most preferred layout.


Loads of floral and swirls, together with touches of twine, burlap, handwritten script and woodgrain effects which I transformed bits of chipboards into. Since the front is already quite dimensional, I kept the back of the book as simple as possible.


Wedding is just only a ceremonial indication of a marriage between a man and a woman, what's really important is the marriage itself. Therefore, I didn't just stop at the front cover, and think it'd be better to have one more layout of this lovely couple right at the very first page of the book which marks as the very new beginning for them after their wedding.


I hope the guest book has been filled up! 

Below is a list of supplies I used for this project with some links included. Unfortunately, not all are available and most 7gypsies and Tattered Angels products can be purchase at Canvas Corp website itself:
  • 7gypsies Architextures 
    • Vintage 12" x 12" Ledger 
    • Mix and Match Bee 8.5″x 11″ Book
    • Mixed Media Pack
  • Tattered Angels 
    • High Impact Paints (Antique Gold & Platinum)
    • Naturally Aged Kit – Rusty Metal (Faux Finish Paint Kit)
    • Color Wash Paint Faux Finish (Verdigris)
    • Glimmer Mist (Key Lime Pie)
  • Sizzix Tim Holtz Dies
  • Ranger Archival Ink in Jet Black (Blitsy, Scrapbook.com)
  • Own stash (burlap, jute twine, mini alpha chipboards, scripted handwriting & bark grain stamps) 

Tuesday 15 May 2018

A French Carnival Sweet Paper Jar

Good day everyone! 

I'm so glad despite of my recent erratic hours, I manage to squeeze some time in between to showcase an interesting way in how to embellish a paper jar using the various dies from Spellbinders for Canvas Corp Brands' Product Match Up series. This will be especially useful if you're their Club Kit members.


I've this French Carnival idea at the back of my mind with an attempt to do up a Parisian concept-base project. I deliberately chose red and ivory as my main colours and would love to do up something sweet for a friend and sister-in-Christ. Without much consideration, I decided to do up another paper jar, based on a tutorial I did for my Graphic 45 Ambassador Audition entry last month. To give the jar a some dainty look, I added some Tresor de Luxe laces around the jar before embellishing. Move over to Canvas Corp blog here to view how I get all this done up! 


So here is the final product (with more pictures below) which I've already gifted to my friend on Sunday for her birthday. I filled up the jar with some sweets and small gifts within the gift box prior in gifting, which are not captured in the pictures here. However, this can serve as a good gift idea that's one of a kind; handmade and nowhere else available for purchase. After all sweets are consumed, the jar itself can be continued used as it labelled as or to store other things.


The top of the lid...

The gift box...


Using an eye bolt screw, I hang a small tag with handwritten birthday wishes beneath the lid that further make this gift a more personalized one. Well, that's how I used the various Spellbinders Club Kit dies to compliment and match up the various papers from Canvas Corp. If you're not or yet to become Spellbinders Club Kit member, you can simply sign up as a new member and get 15% off your fist kit by using this coupon code: CLUB15. As good as it'll last, therefore do sign up before it's gone for good!! 

Below is a full list of supplies I used for this project together with various links in where to get them:


    Sunday 8 April 2018

    Graphic 45 2018 Brand Ambassador Audition


    The moment is finally here... Despite of my rather tight schedule recently, I managed to get this posted in time hoping I'll get a chance to be considered to be part of Graphic 45 again. Missing all the fun I had previously, it was a good rest in between and I'd want to take this opportunity to come back and provide more creative inspirations. Heading straight ahead, here are the projects I created for this audition.

    Project One: Cafe Parisian Candies Paper Jar (step-by-step tutorial)
    Earth day is approaching (22nd April) and I think it'd be good to do up some upcycling project and transform them into daily useful items. Besides being a "junk collector", I do keep quite a number of disposable items which I find them as potential upcycling objects. And those jumbo toilet rolls are one of them which I kept many of them. For they are sturdy and hard enough, they provide very good bases for jar making. 


    Notice a little butterfly among the flowers?


    May it for your pantry storage or even as a gift, it doesn't cost that much to do up one. Trust me, it's not going to be that difficult. You just need to be a little patient while working on it. I decided to do up a step-by-step tutorial which is more clear than video tutorials.

    Supplies List:

    Project Two: Nature Sketchbook Merci Beaucoup Butterfly Duo Cards
    The very next project I created are these duo thank you cards for a lovely couple who is coming to Singapore from the USA this week. Using the Nature Sketchbook paper collection, I made these dimensional cards using a pair of butterflies denoting the loveliness of the couple onto the contrasting patterns of the papers.


    Supplies List:
    I hope these have been a good source of inspiration and pleasing to the judging panel for this audition. I also wish all participants the very best for this year audition as well.

    Cheers!!! And keep on creating to inspire!!! I shall see you all very soon again for subsequent creations and tutorials...


    Thursday 8 March 2018

    Beautiful Magic Wishes Treat Bags


     "Wishes are the magic in your heart that cause beautiful things to happen..."

    What a sweet sentiment that will make your heart flutter! Everyone loves to make wishes and wish for some beautiful magic to happen. It's a natural kind of hope humans have instinctively which make us wanting to wish for beautiful things to happen; somehow or rather.

    Wishes do come true when you really hope for it and wanted it so much to happen. Things do happen and sometimes way beyond you could ever imagine. For the past year or so, some amazing things did happened in my life! One important event was the day I found myself added into the LORD's Church which led me to discover a lot of wonderful people around the world; a universal church that's so true and pure that transcends all humans' doctrines and creeds. It was also through a wish I had since young that I had finally found reconciliation with the ONE & ONLY true God that creates this universe, after decades of searching.

    Beautiful sunset at one of the villages in Bacolod I visited. 

    I was trying to "pinch" the sun away! 😄

    In last September, I was on this unique privilege to be on a mission trip with some of brethren within my congregation to the Philippines. It was through this trip I got to see the beauty behind the LORD's Church and why we are so spiritually bonded via Christ regardless of our social status, background, culture, ethnicity and language. The young and old, men and women all gather together because of one unifying reason. It was because of this reason, we encourage and edify one another to grow. 


    I personally had a wonderful experience via this mission trip which I learn so much about the LORD's Church and got to appreciate even more the beauty behind this Truth that binds us together no matter where we are. Prior in coming back to Singapore, I decided to buy some goodies from the Philippines and gifted them to some of the brethren within my local congregation. I packed them inside these brown paper bags where I stamped this sentiment from Tim Holtz Good Thoughts onto the front, and secured the bags with some jute twine.

    Disclaimer: No nicotine was packed within.
    It's actually a combination of the names of a lovely couple Nicodemus and Christine.


    To ended off the packaging interestingly, I punched some small little round tags to get them to untie the magic here! Pretty much sums up on the message that's printed in the front.